In this tutorial we’ll see how to integrate AWS Cognito together with Django Rest Framework. The end result would be that most of the details related to the user will be stored & managed by AWS cognito which reduces the hassle of managing users.
Setting up the frontend (with AWS Amplify + Cognito)
Lets first create a simple react app. Please make sure to install latest & stable version of nodejs and npm
# Create a new react app and cd into it
npx create-react-app frontend_drf_cognito && cd $_

# Install AWS Amplify
yarn add aws-amplify @aws-amplify/ui-react aws-amplify-react

# In another terminal/prompt, globally install AWS Amplify CLI
npm install -g @aws-amplify/cli
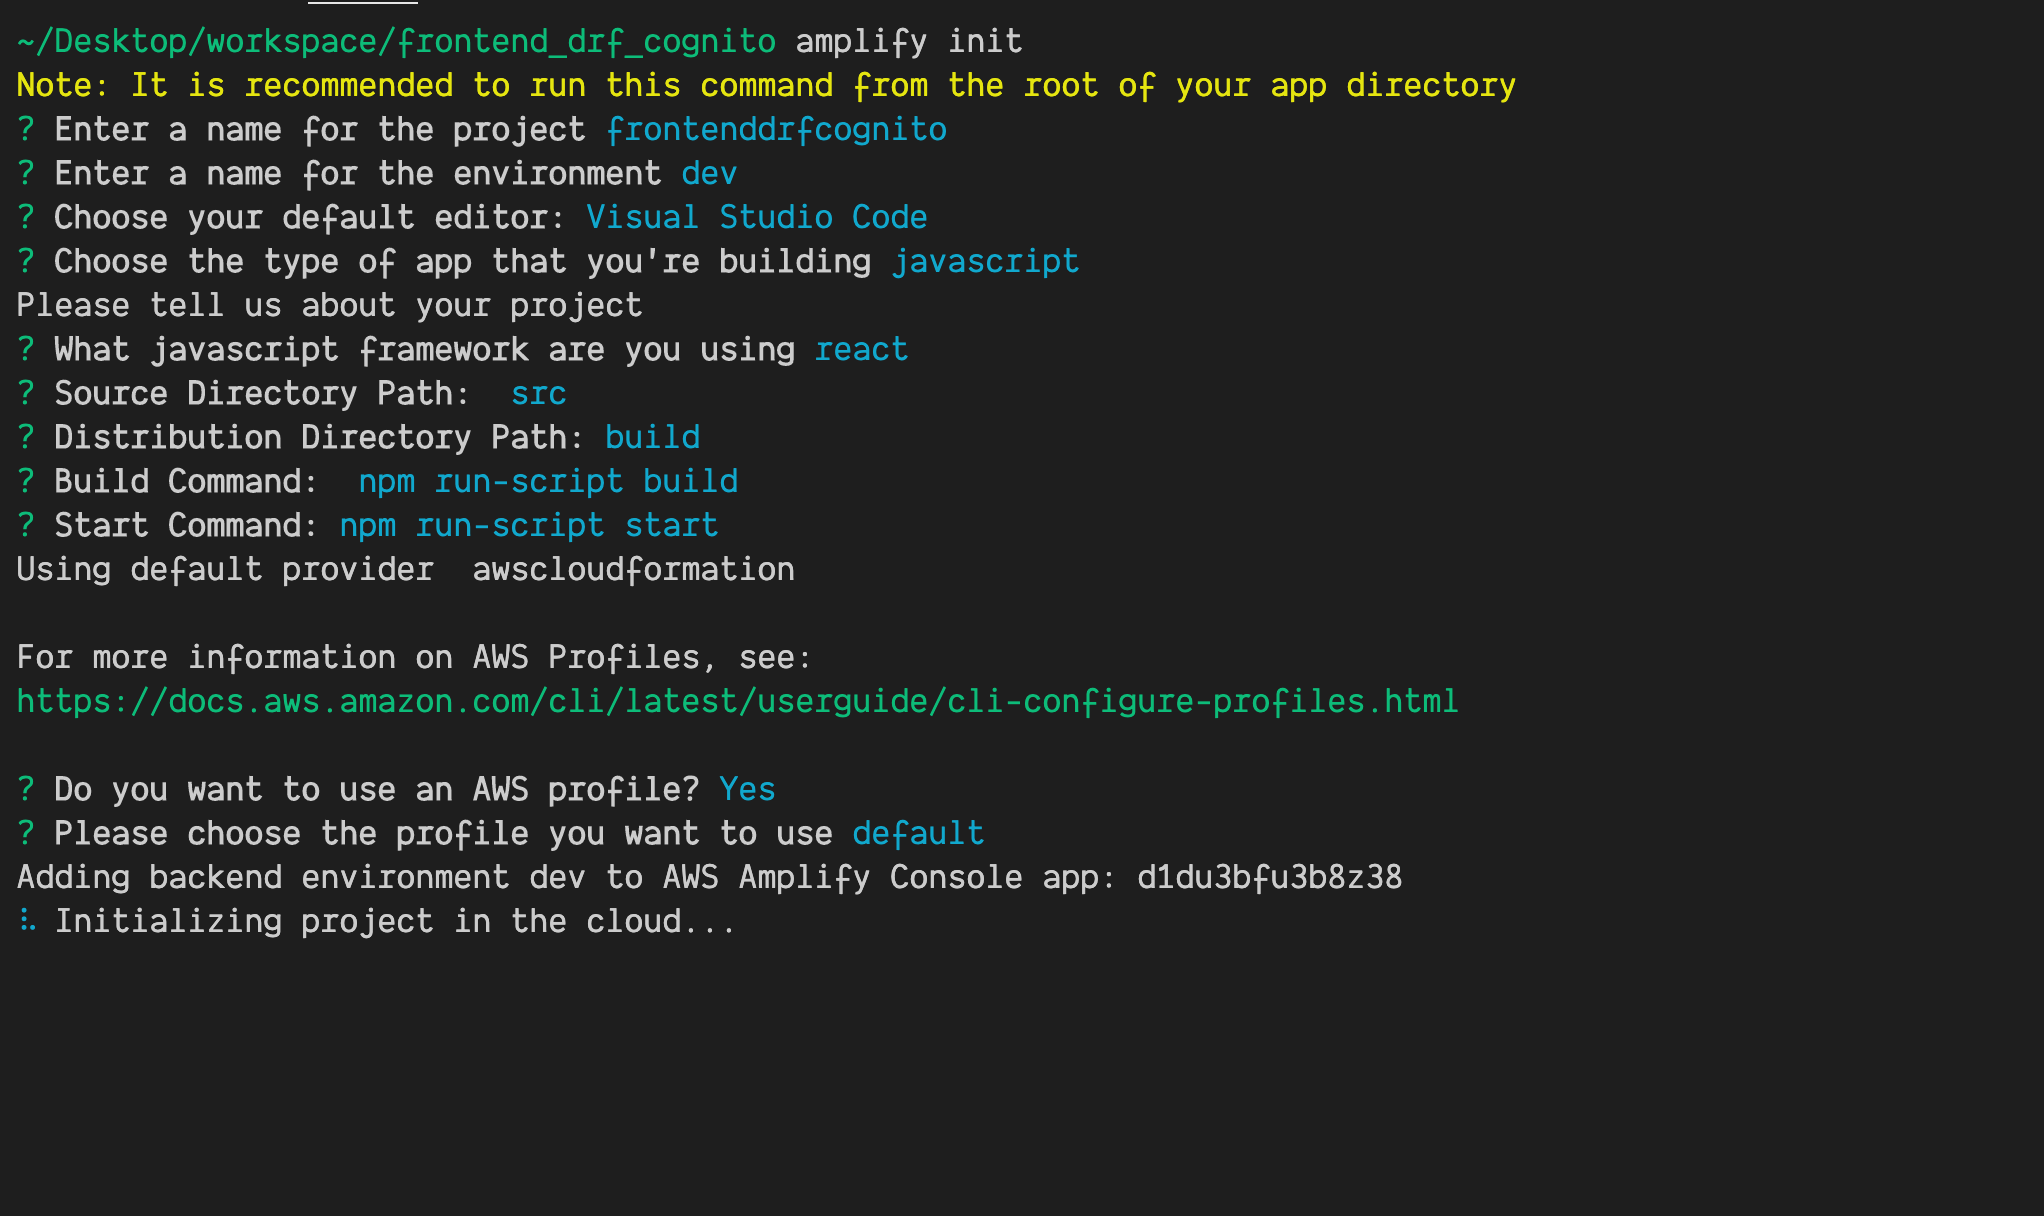
Now that the initial setup is done, lets initialize AWS Amplify in our project root directory using the command amplify init. Give the details as per the image below
 We can also import existing amplify app using
 amplify pull
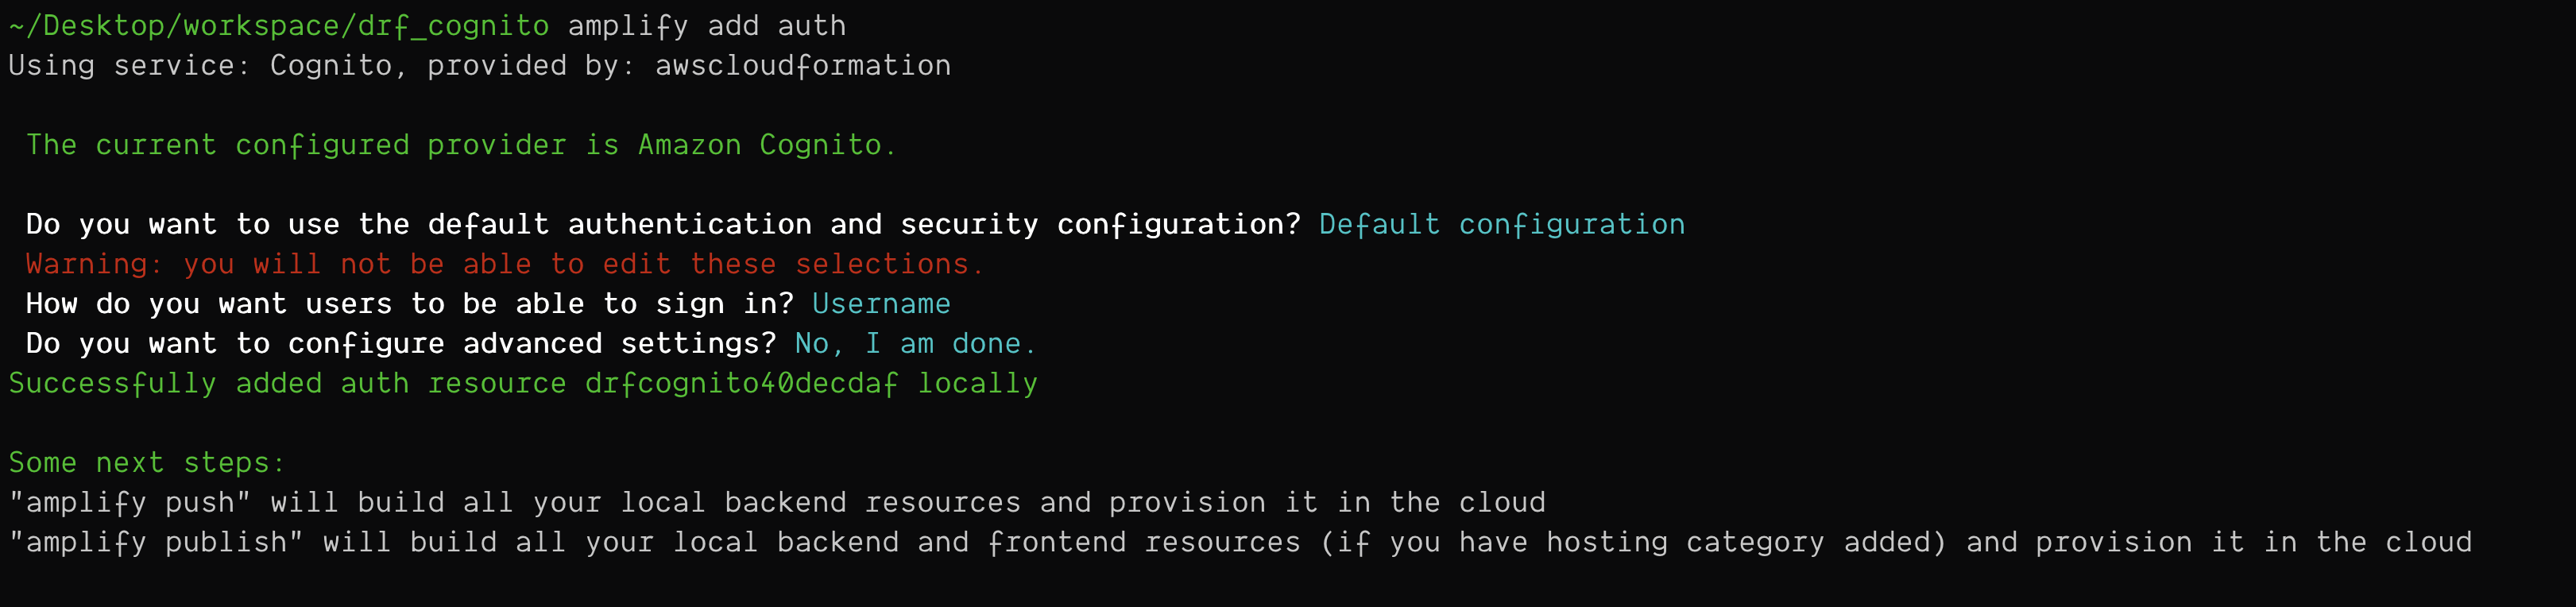
Note: Make sure that you have authentication module enabled in amplify. If not, just add it using amplify add auth.
 Once done, run the command
 amplify push which will provision the required resources i.e. creating userpool, creating roles with required permissions, etc.
Now that cognito userpool has been created, open the file src/aws-exports.js. It should be something like this
...
const awsmobile = {
    ...
    ...
    ...
    "aws_user_pools_id": "ap-southeast-1_XXXXXXXXX",
    "aws_user_pools_web_client_id": "XXXXXXXXXXXXXXXXXXXXXXX",
    ...
};
export default awsmobile;
Make sure to take note of aws_user_pools_id and aws_user_pools_web_client_id as they’ll be used as environment variables in the django application. We’ll be setting them to the vars AWS_APP_CLIENT_ID and AWS_USER_POOLS_ID
Finally start the frontend server using yarn start
Setting up the backend (Django Application)
Lets look at some simple steps to setup a django project with drf. Also please run cd .. to make sure that we’re not mixing frontend and backend in the same directories. Its always better to keep both of them in different directories
# Setup virtualenv
mkvirtualenv drf_cognito -p python3

# Selecting an existing virtual environment
workon drf_cognito

# Installing django, drf and python-jose
pip install django djangorestframework python-jose

# Initialize the project
django-admin startproject drf_cognito

# Create a demo app
django-admin startapp articles

# Better to have separate module for cognito auth
django-admin startapp cognito
Once we’re ready with the app, lets add a few lines to settings. Also make sure to set the environment variables AWS_APP_CLIENT_ID and AWS_USER_POOLS_ID which were generated in cognito setup above.
backend_drf_cognito/settings.py
...
...
...
# Application definition

INSTALLED_APPS = [
    ...
    ...
    "rest_framework",
]

LOCAL_APPS = [
    "articles",
]

INSTALLED_APPS += LOCAL_APPS

MIDDLEWARE = [
    ...
    "django.contrib.auth.middleware.AuthenticationMiddleware",
    "cognito.middleware.CognitoAuthMiddleware",
    ...
]
...
...
...
# AWS Cognito Configuration
COGNITO_CONFIG = {
    # URL consists of https://{pool-name}.auth.{region}.amazoncognito.com/oauth2/token
    # Replace it below accordingly
    "url": "https://frontenddrfcognito77b3bdee_userpool_77b3bdee-dev.auth.ap-southeast-2.amazoncognito.com/oauth2/token",
    "app_client_id": os.environ["AWS_APP_CLIENT_ID"],
    "region": "ap-southeast-2",
    "aws_user_pools_id": os.environ["AWS_USER_POOLS_ID"],
    "aws_user_pools_web_client_id": os.environ["AWS_APP_CLIENT_ID"],
}

# Rest Framework settings
REST_FRAMEWORK = {
    "DEFAULT_AUTHENTICATION_CLASSES": [
        "cognito.authentication.CognitoAuthentication",
    ],
}
For simplicity lets just have name of the article in the model.
articles/models.py
# Default imports
from django.db import models

# Custom imports
# None


class Article(models.Model):
    name = models.CharField(max_length=50)

    def __str__(self) -> str:
        return self.name
A serializer for articles
articles/serializers.py
# Default imports
from rest_framework import serializers

# Custom imports
from .models import Article


class ArticleSerializer(serializers.ModelSerializer):
    class Meta:
        model = Article
        fields = "__all__"
Standard generics template for listing & creating articles using DRF
articles/views.py
# Default imports
from rest_framework import generics

# Custom imports
from .models import Article
from .serializers import ArticleSerializer


class ListCreateArticles(generics.ListCreateAPIView):
    serializer_class = ArticleSerializer
    queryset = Article.objects.all()
URLs to navigate the the views created
articles/urls.py
# Default imports
from django.urls import path

# Custom imports
from .views import ListCreateArticles

urlpatterns = [
    path("", ListCreateArticles.as_view(), name="list_create_articles"),
]
Update project urls as well
drf_cognito_auth/urls.py
from django.contrib import admin
from django.urls import path, include

urlpatterns = [
    path("admin/", admin.site.urls),
    path("articles/", include("articles.urls")),
]
Finally make migrations and migrate
python manage.py makemigrations && python manage.py migrate
Integrating DRF with Cognito
Now we need to integrate AWS Cognito as an authentication backend which will be internally used by django to recognise the user who is signing in and maintain their session when accessing any APIs.
So let’s setup a middleware
cognito/middleware.py
...
# Other imports
...

class CognitoAuthMiddleware(
    CognitoAuthenticationMixin, middleware.AuthenticationMiddleware
):
    @staticmethod
    def get_auth_token(request):
        try:
            return request.META["HTTP_AUTHORIZATION"]
        except Exception:
            raise NoAuthToken()

    def process_request(self, request):
        if request.path.startswith(reverse("admin:index")):
            return None
        request.user = SimpleLazyObject(lambda: self.authenticate(request))
For easy code reading, we have written a separate mixin for cognito authentication
cognito/authentication.py
...
# Other imports
from . import keys
# Make sure to have the keys array in the __init__.py file
# in the cognito folder
# Standard Format:
# keys = [{...},{...}]

# In order to get the keys data, visit
# https://cognito-idp.{region}.amazonaws.com/{userPoolId}/.well-known/jwks.json
# Replace region and userPoolId with respective values
...

def get_jwt_claims(token):
    # get the kid from the headers prior to verification
    headers = jwt.get_unverified_headers(token)
    kid = headers["kid"]
    # search for the kid in the downloaded public keys
    key_index = -1
    for i in range(len(keys)):
        if kid == keys[i]["kid"]:
            key_index = i
            break
    if key_index == -1:
        print("Public key not found in jwks.json")
        return []
    # construct the public key
    public_key = jwk.construct(keys[key_index])
    # get the last two sections of the token,
    # message and signature (encoded in base64)
    message, encoded_signature = str(token).rsplit(".", 1)
    # decode the signature
    decoded_signature = base64url_decode(encoded_signature.encode("utf-8"))
    # verify the signature
    if not public_key.verify(message.encode("utf8"), decoded_signature):
        print("Signature verification failed")
        return []
    # print("Signature successfully verified")
    # since we passed the verification, we can now safely
    # use the unverified claims
    claims = jwt.get_unverified_claims(token)
    ts = claims["exp"]
    os.environ["TZ"] = "Asia/Kolkata"
    time.tzset()
    print(
        "Current Expiry of Token : {}".format(
            time.strftime("%Y-%m-%d %H:%M:%S", time.localtime(ts))
        )
    )
    # Checking token expiry
    if time.time() > claims["exp"]:
        print("Token is expired")
        return []
    if claims["aud"] != settings.COGNITO_CONFIG["app_client_id"]:
        print("Token was not issued for this audience")
        return []
    return claims


class CognitoAuthenticationMixin:
    @staticmethod
    def get_auth_token(request):
        raise NotImplementedError()

    def authenticate(self, request):
        token = self.get_auth_token(request)
        try:
            claims = get_jwt_claims(token)
            if len(claims) > 0:
                user = UserModel.objects.get(email=claims["email"])
                return user
            raise NoSuchClaims()
        except UserModel.DoesNotExist:
            raise NoSuchUser()
        except Exception:
            raise InvalidAuthToken()


class CognitoAuthentication(
    CognitoAuthenticationMixin, authentication.BaseAuthentication
):
    @staticmethod
    def get_auth_token(request):
        try:
            return request.META["HTTP_AUTHORIZATION"]
        except Exception:
            raise NoAuthToken()

    def authenticate(self, request):
        user = super(CognitoAuthentication, self).authenticate(request)
        return user, None
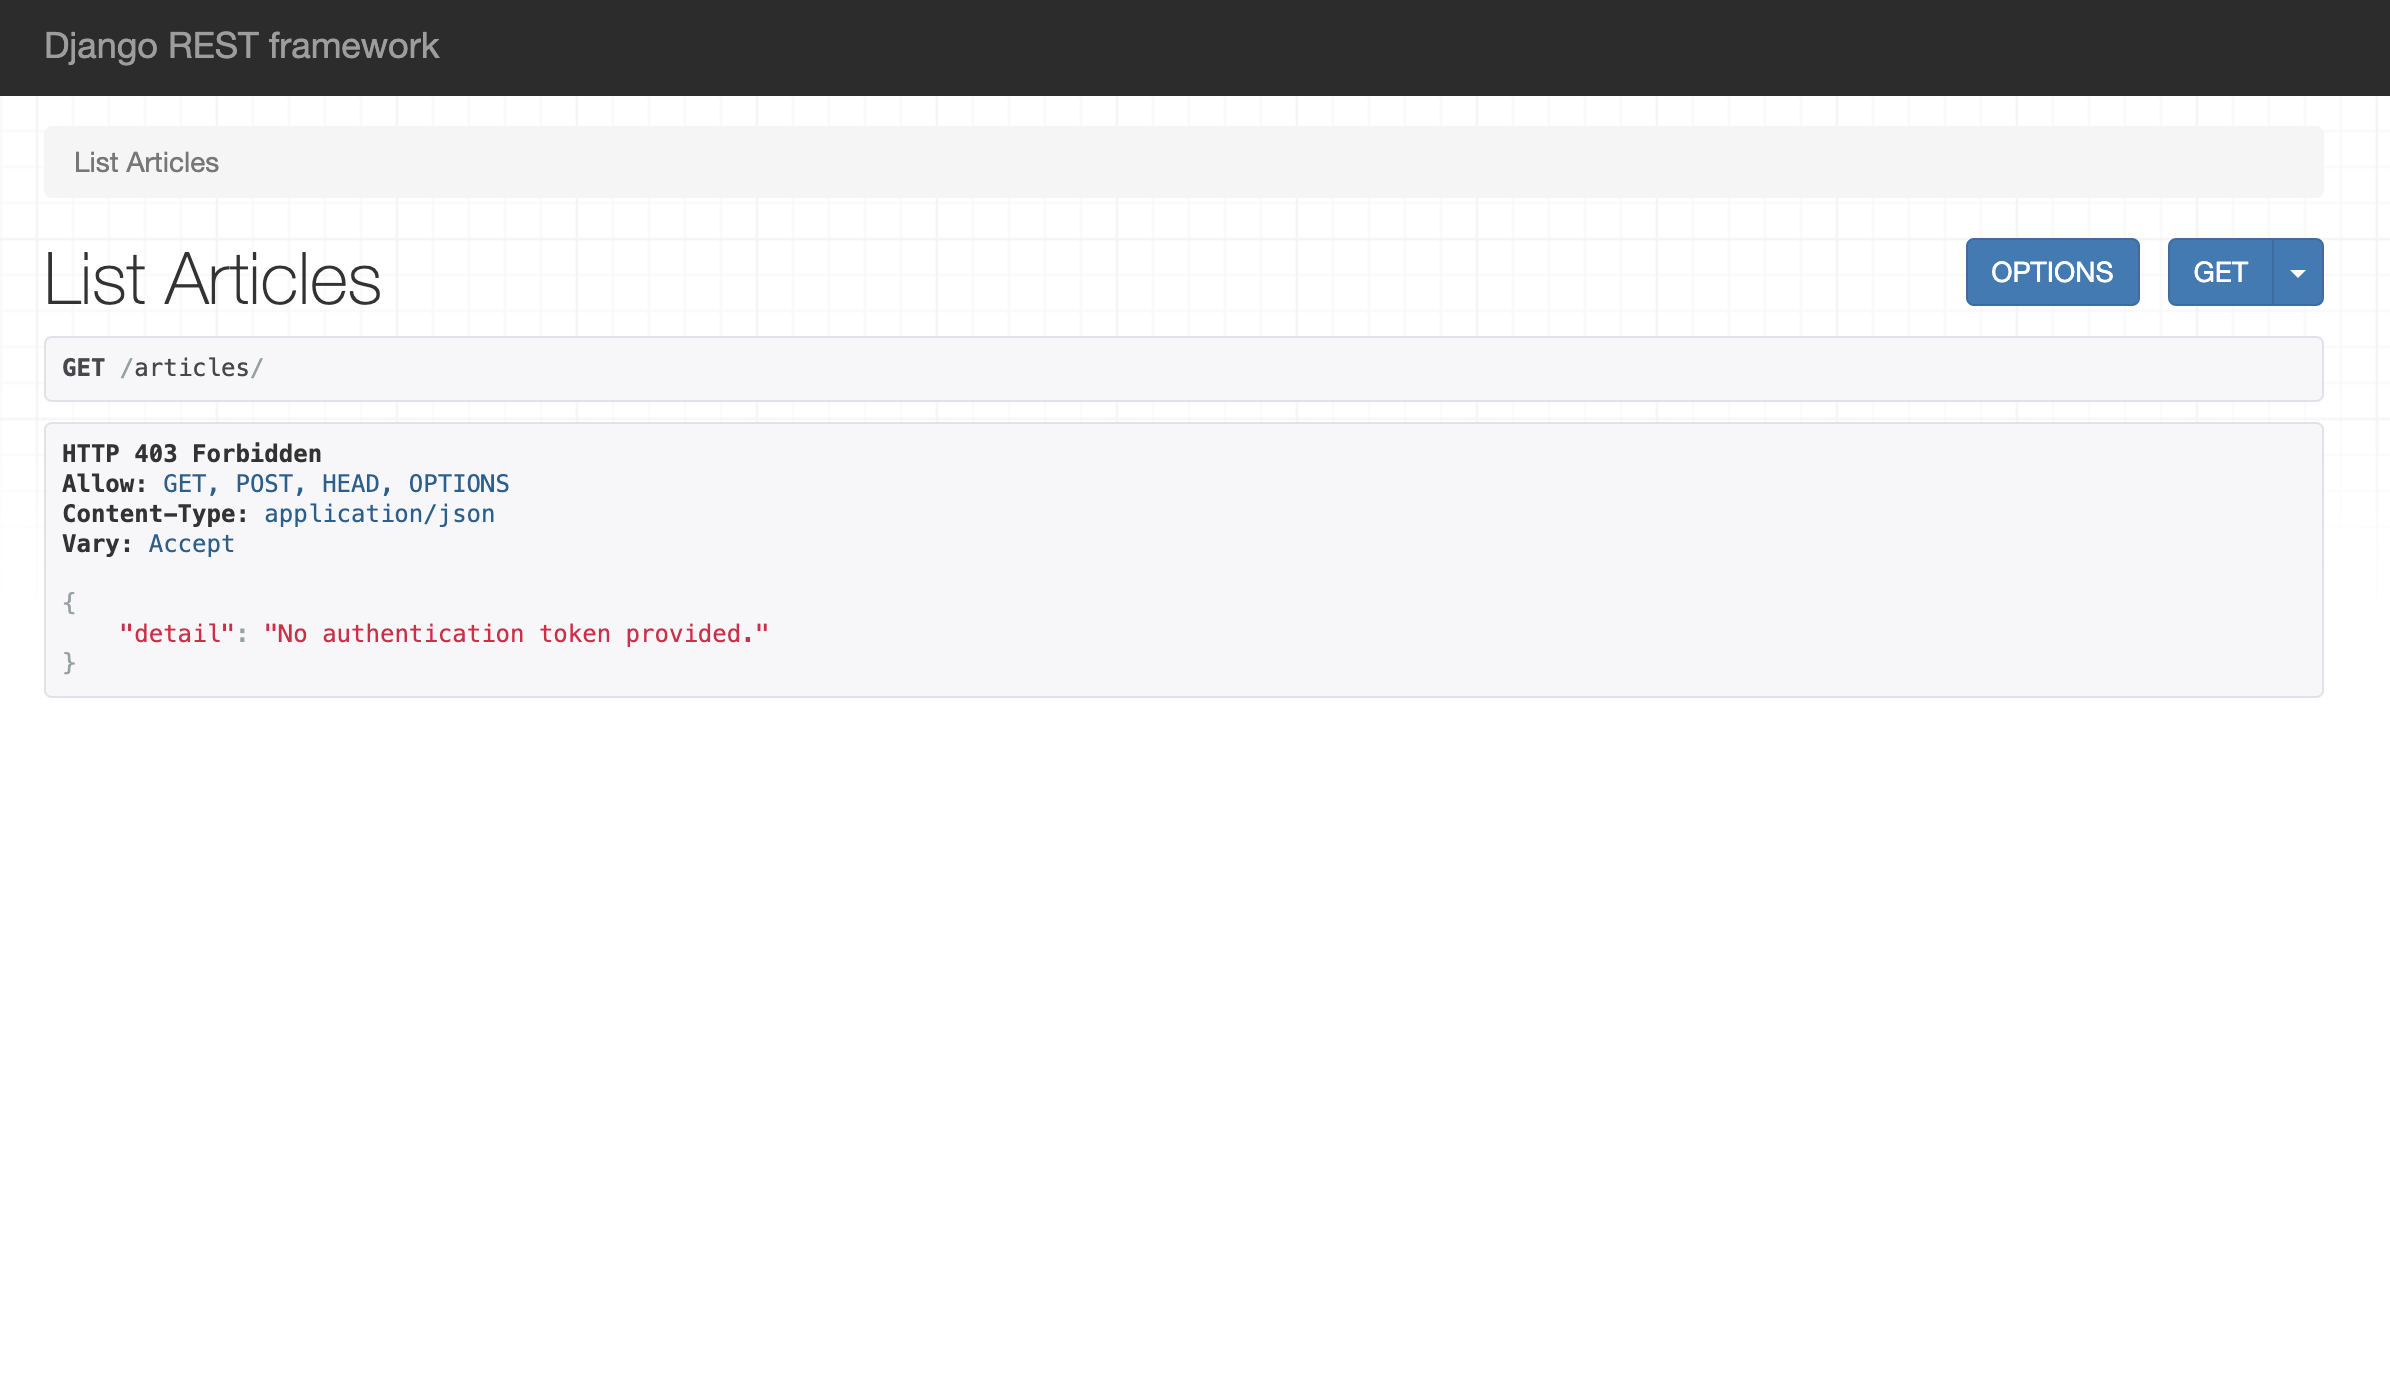
Run the server and visit http://localhost:8000 or the appropriate location to open the django backend server. Navigate to /articles. It should return a HTTP 401 if everthing is configured properly.
Final steps
Now, we should have two servers running, one on port 8000 (backend server) and the other on port 3000 (frontend server).
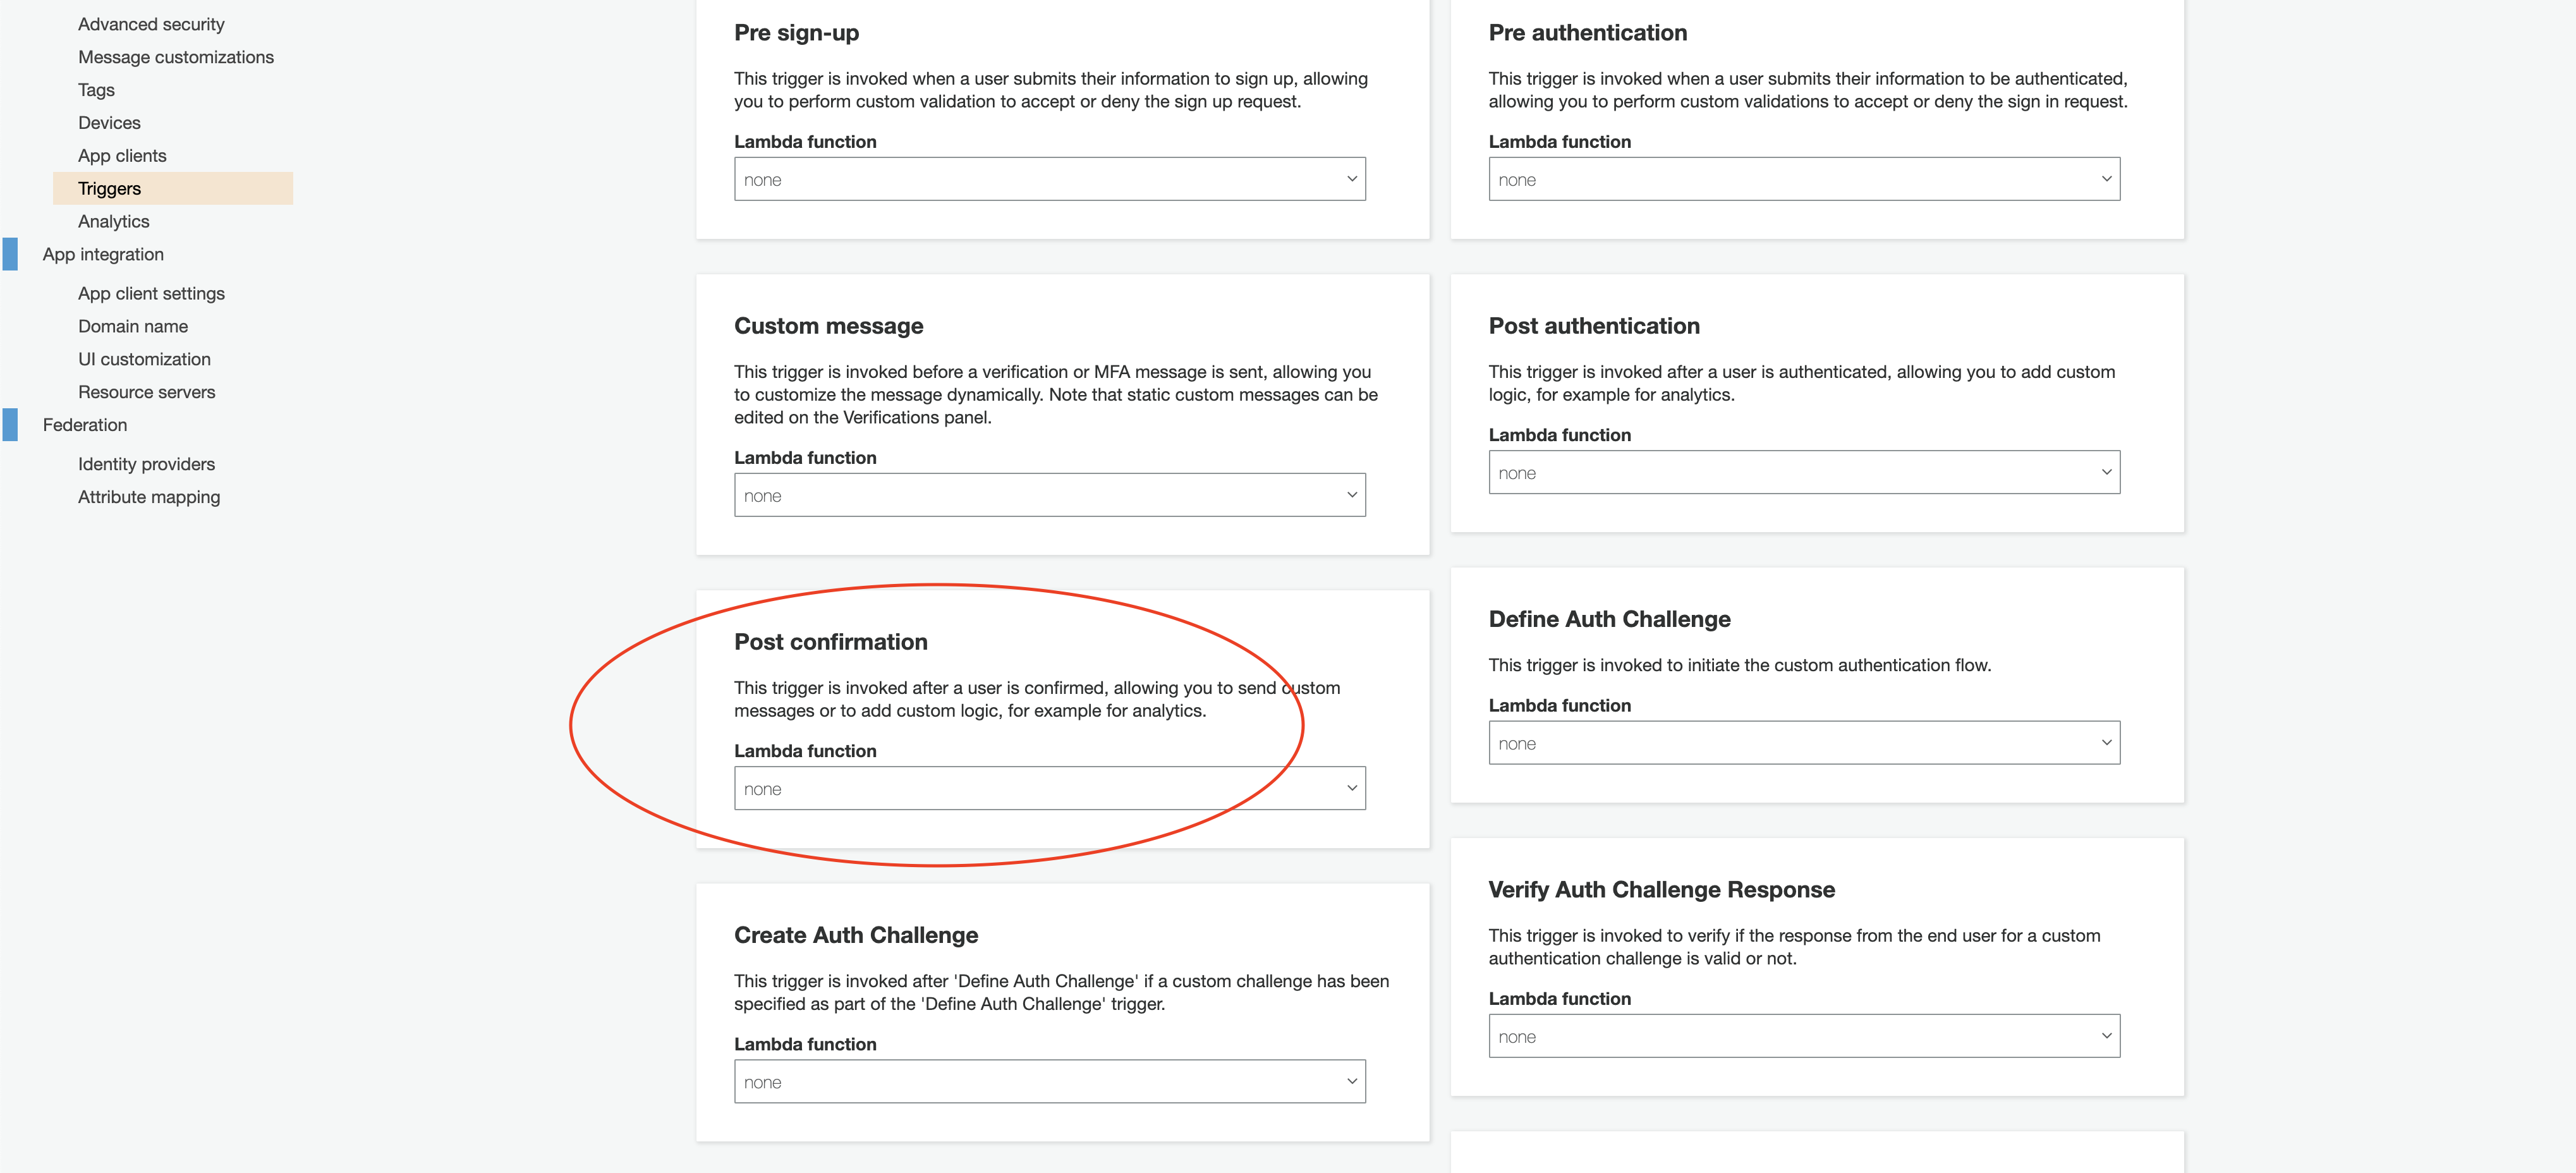
Note: Since we’re running everything locally, we cannot invoke the trigger Post Confirmation to create a user(when the signup is done from the frontend), in our django backend. This is the better way to have an API in django to create users and have it accessible only to the lambda function which is triggering it.
So instead we’re going to manually grab the idToken from frontend and pass it as Authentication headers to the backend since both are connected to the same userpool and identitypool.
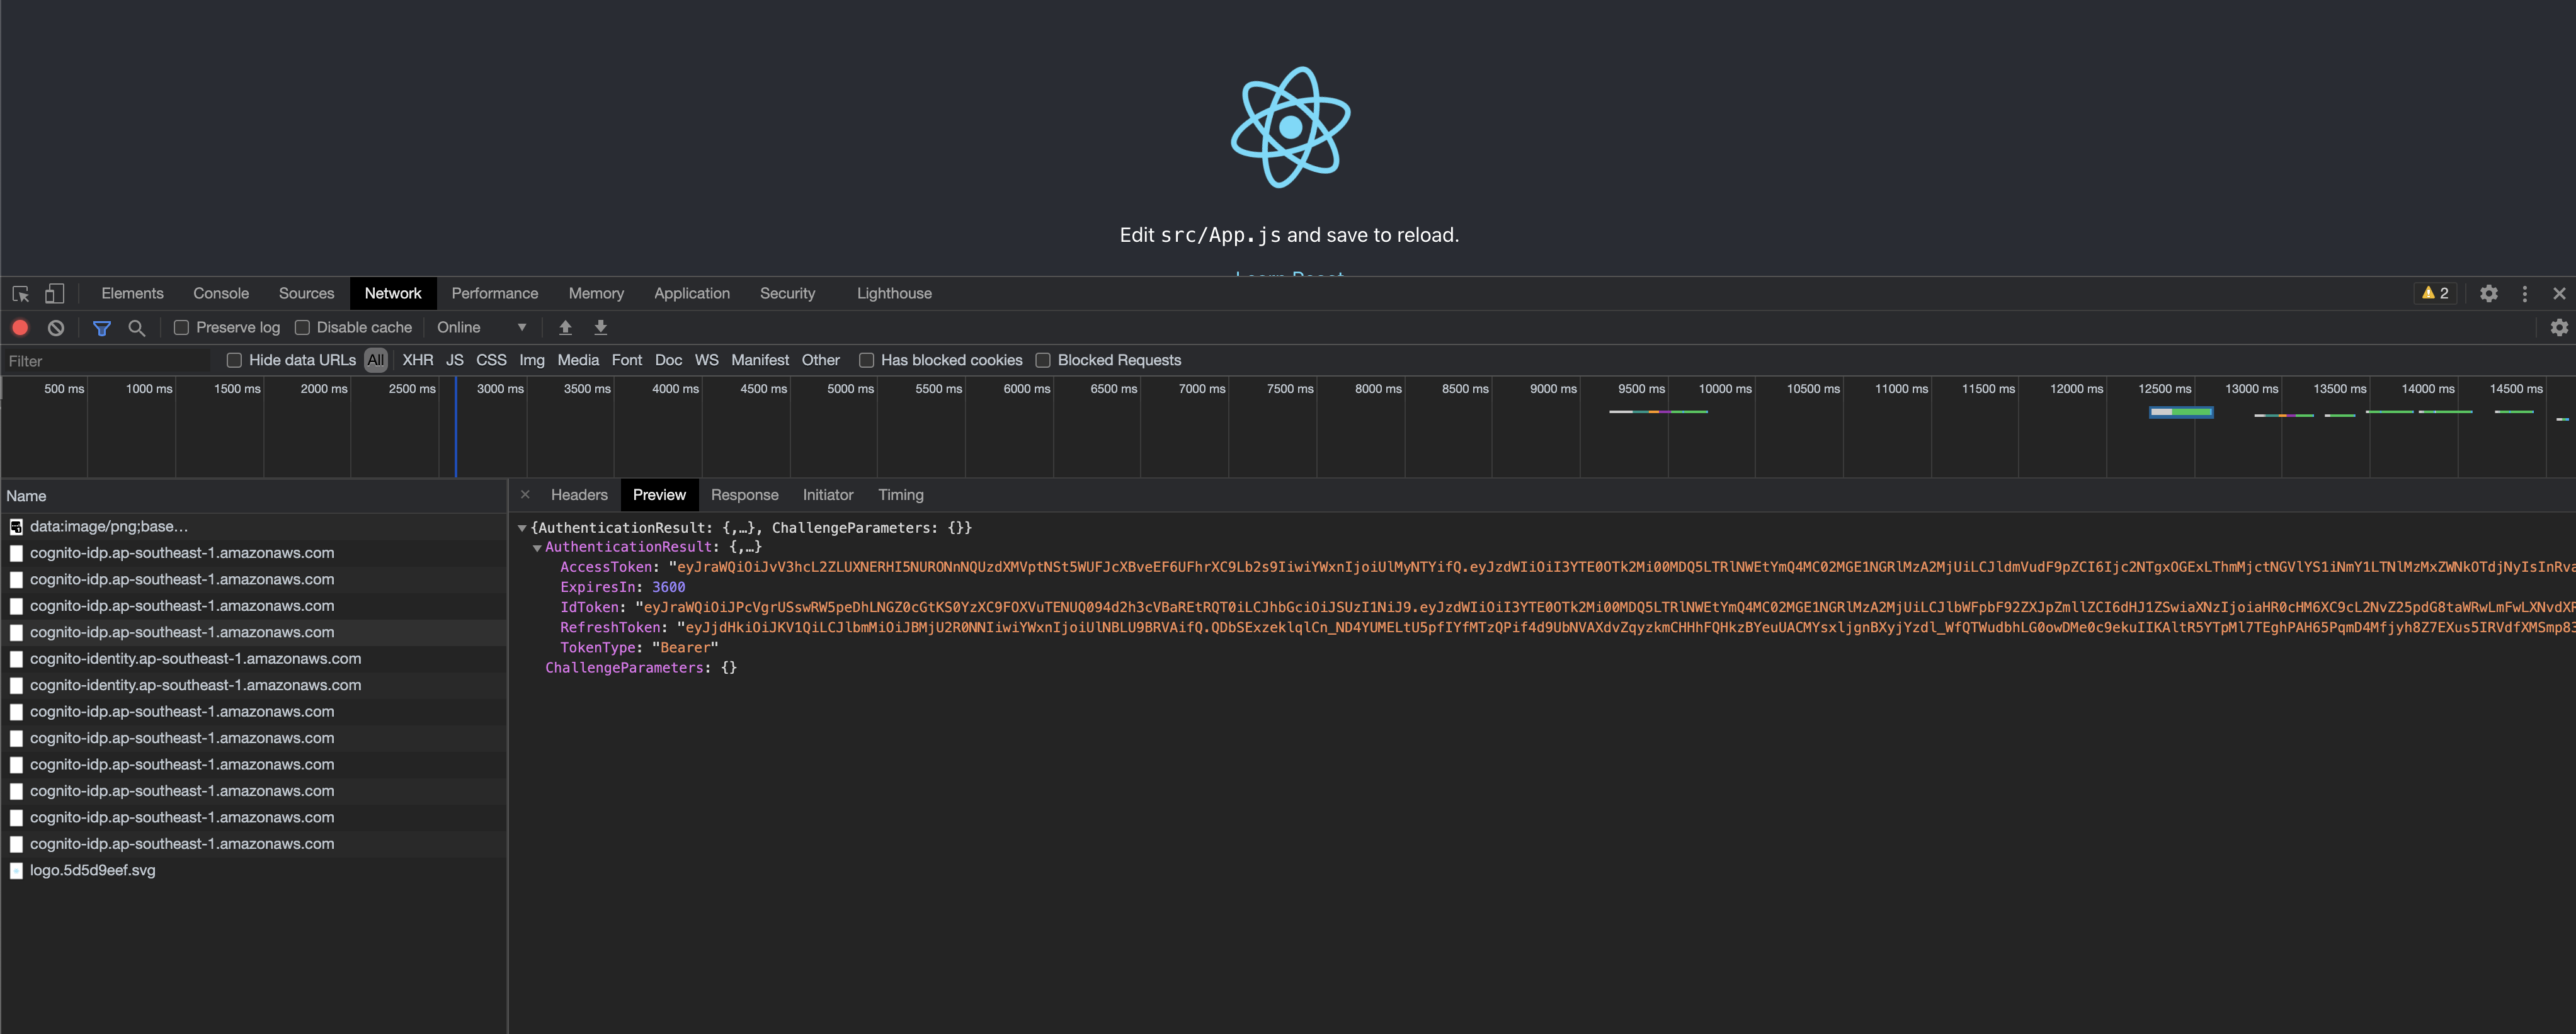
First, goto frontend & signup with a user and confirm the user with the OTP sent to email. Once done, before signing in, right click in your browser and click on Inspect Element, and go to the Network tab. Then perform signin with appropriate credentials and click on the API Calls made to cognito-idp.{region}.amazonaws.com. In the 3rd or 4th tab, you’ll find a JSON with AuthenticationResult. Expand that and copy the value of idToken.
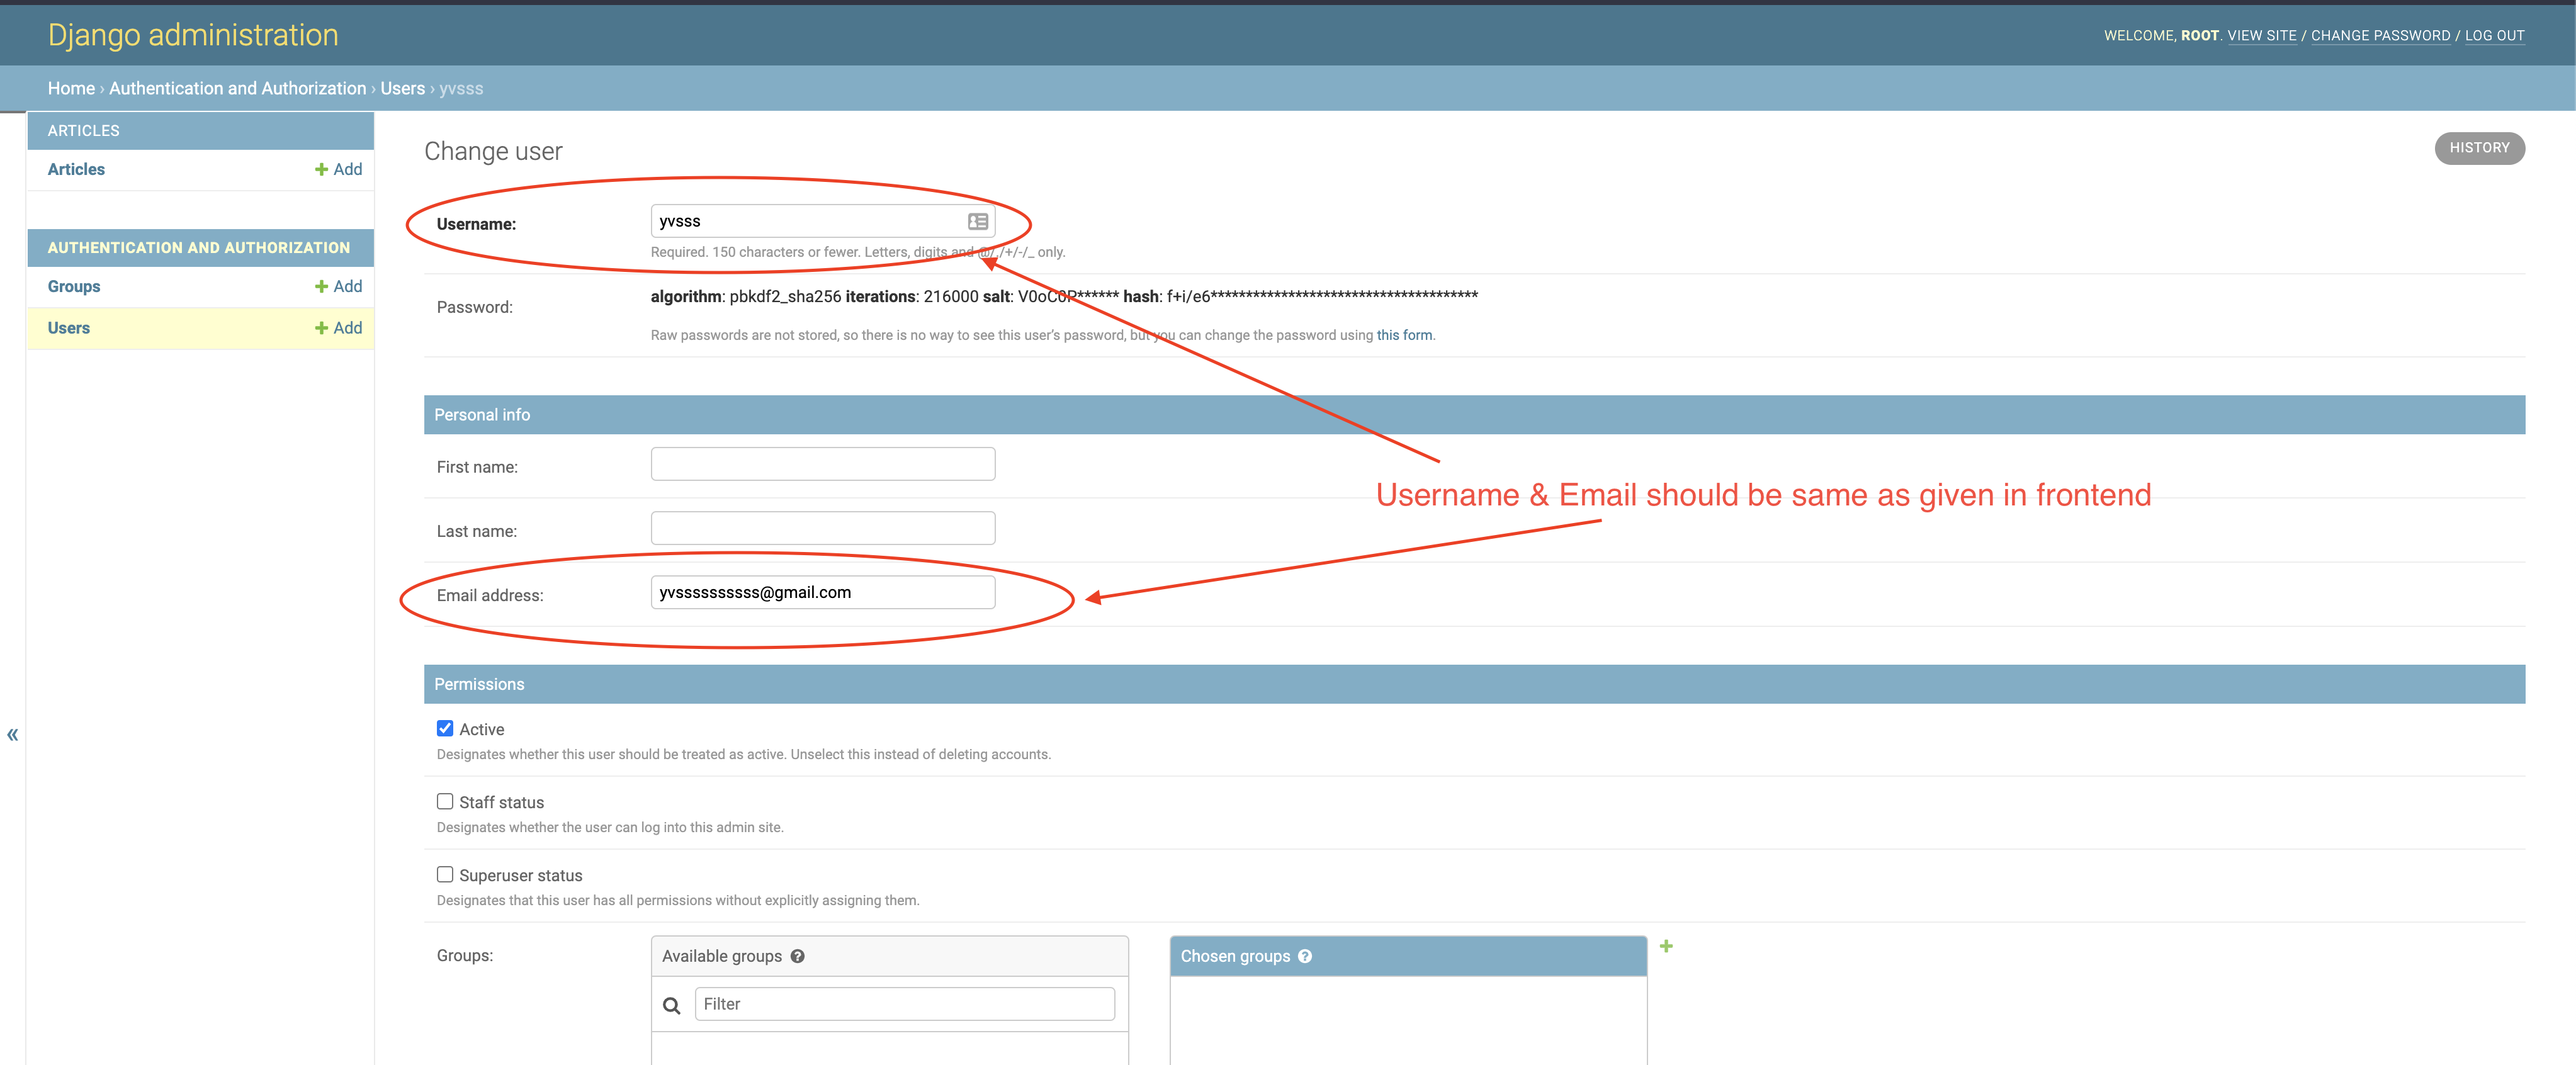
In the backend, goto django admin (http://localhost:8000/admin), signin with superuser credentials and create a new user in the Users page. Make sure to have the same username & email as mentioned which signing up in the frontend application. Once done save the user
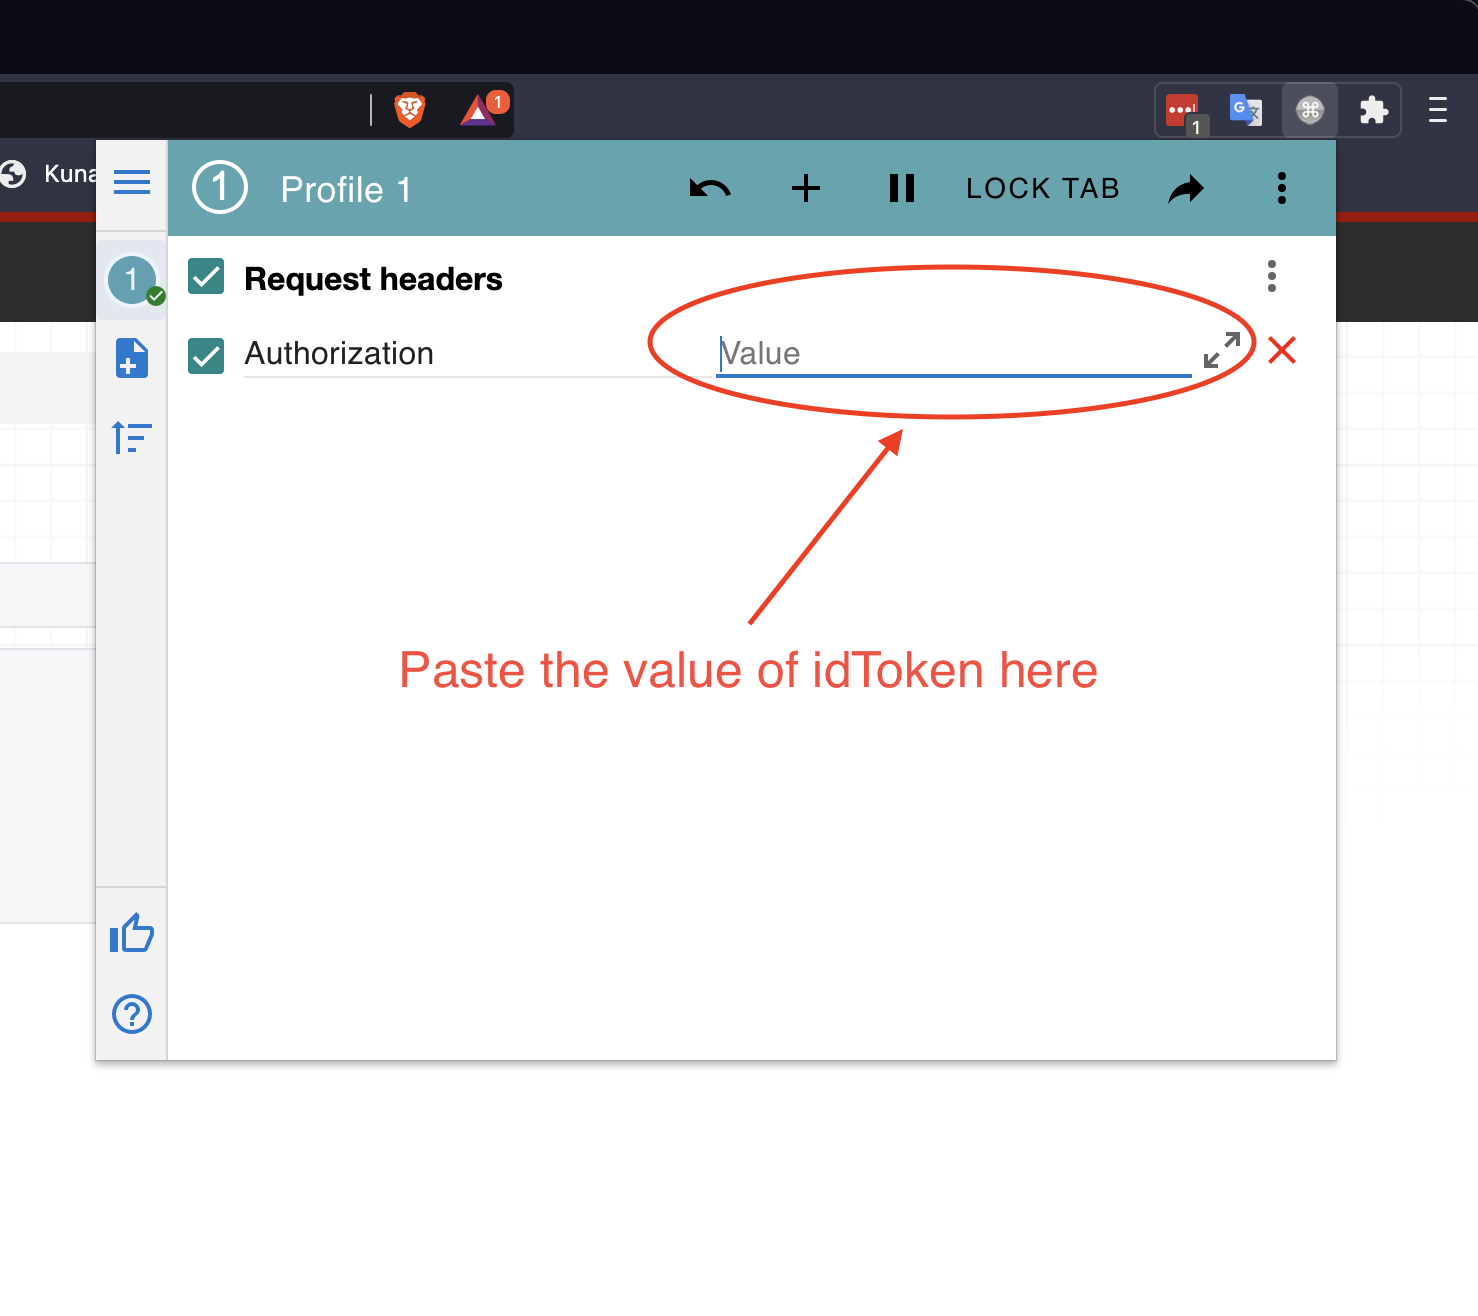
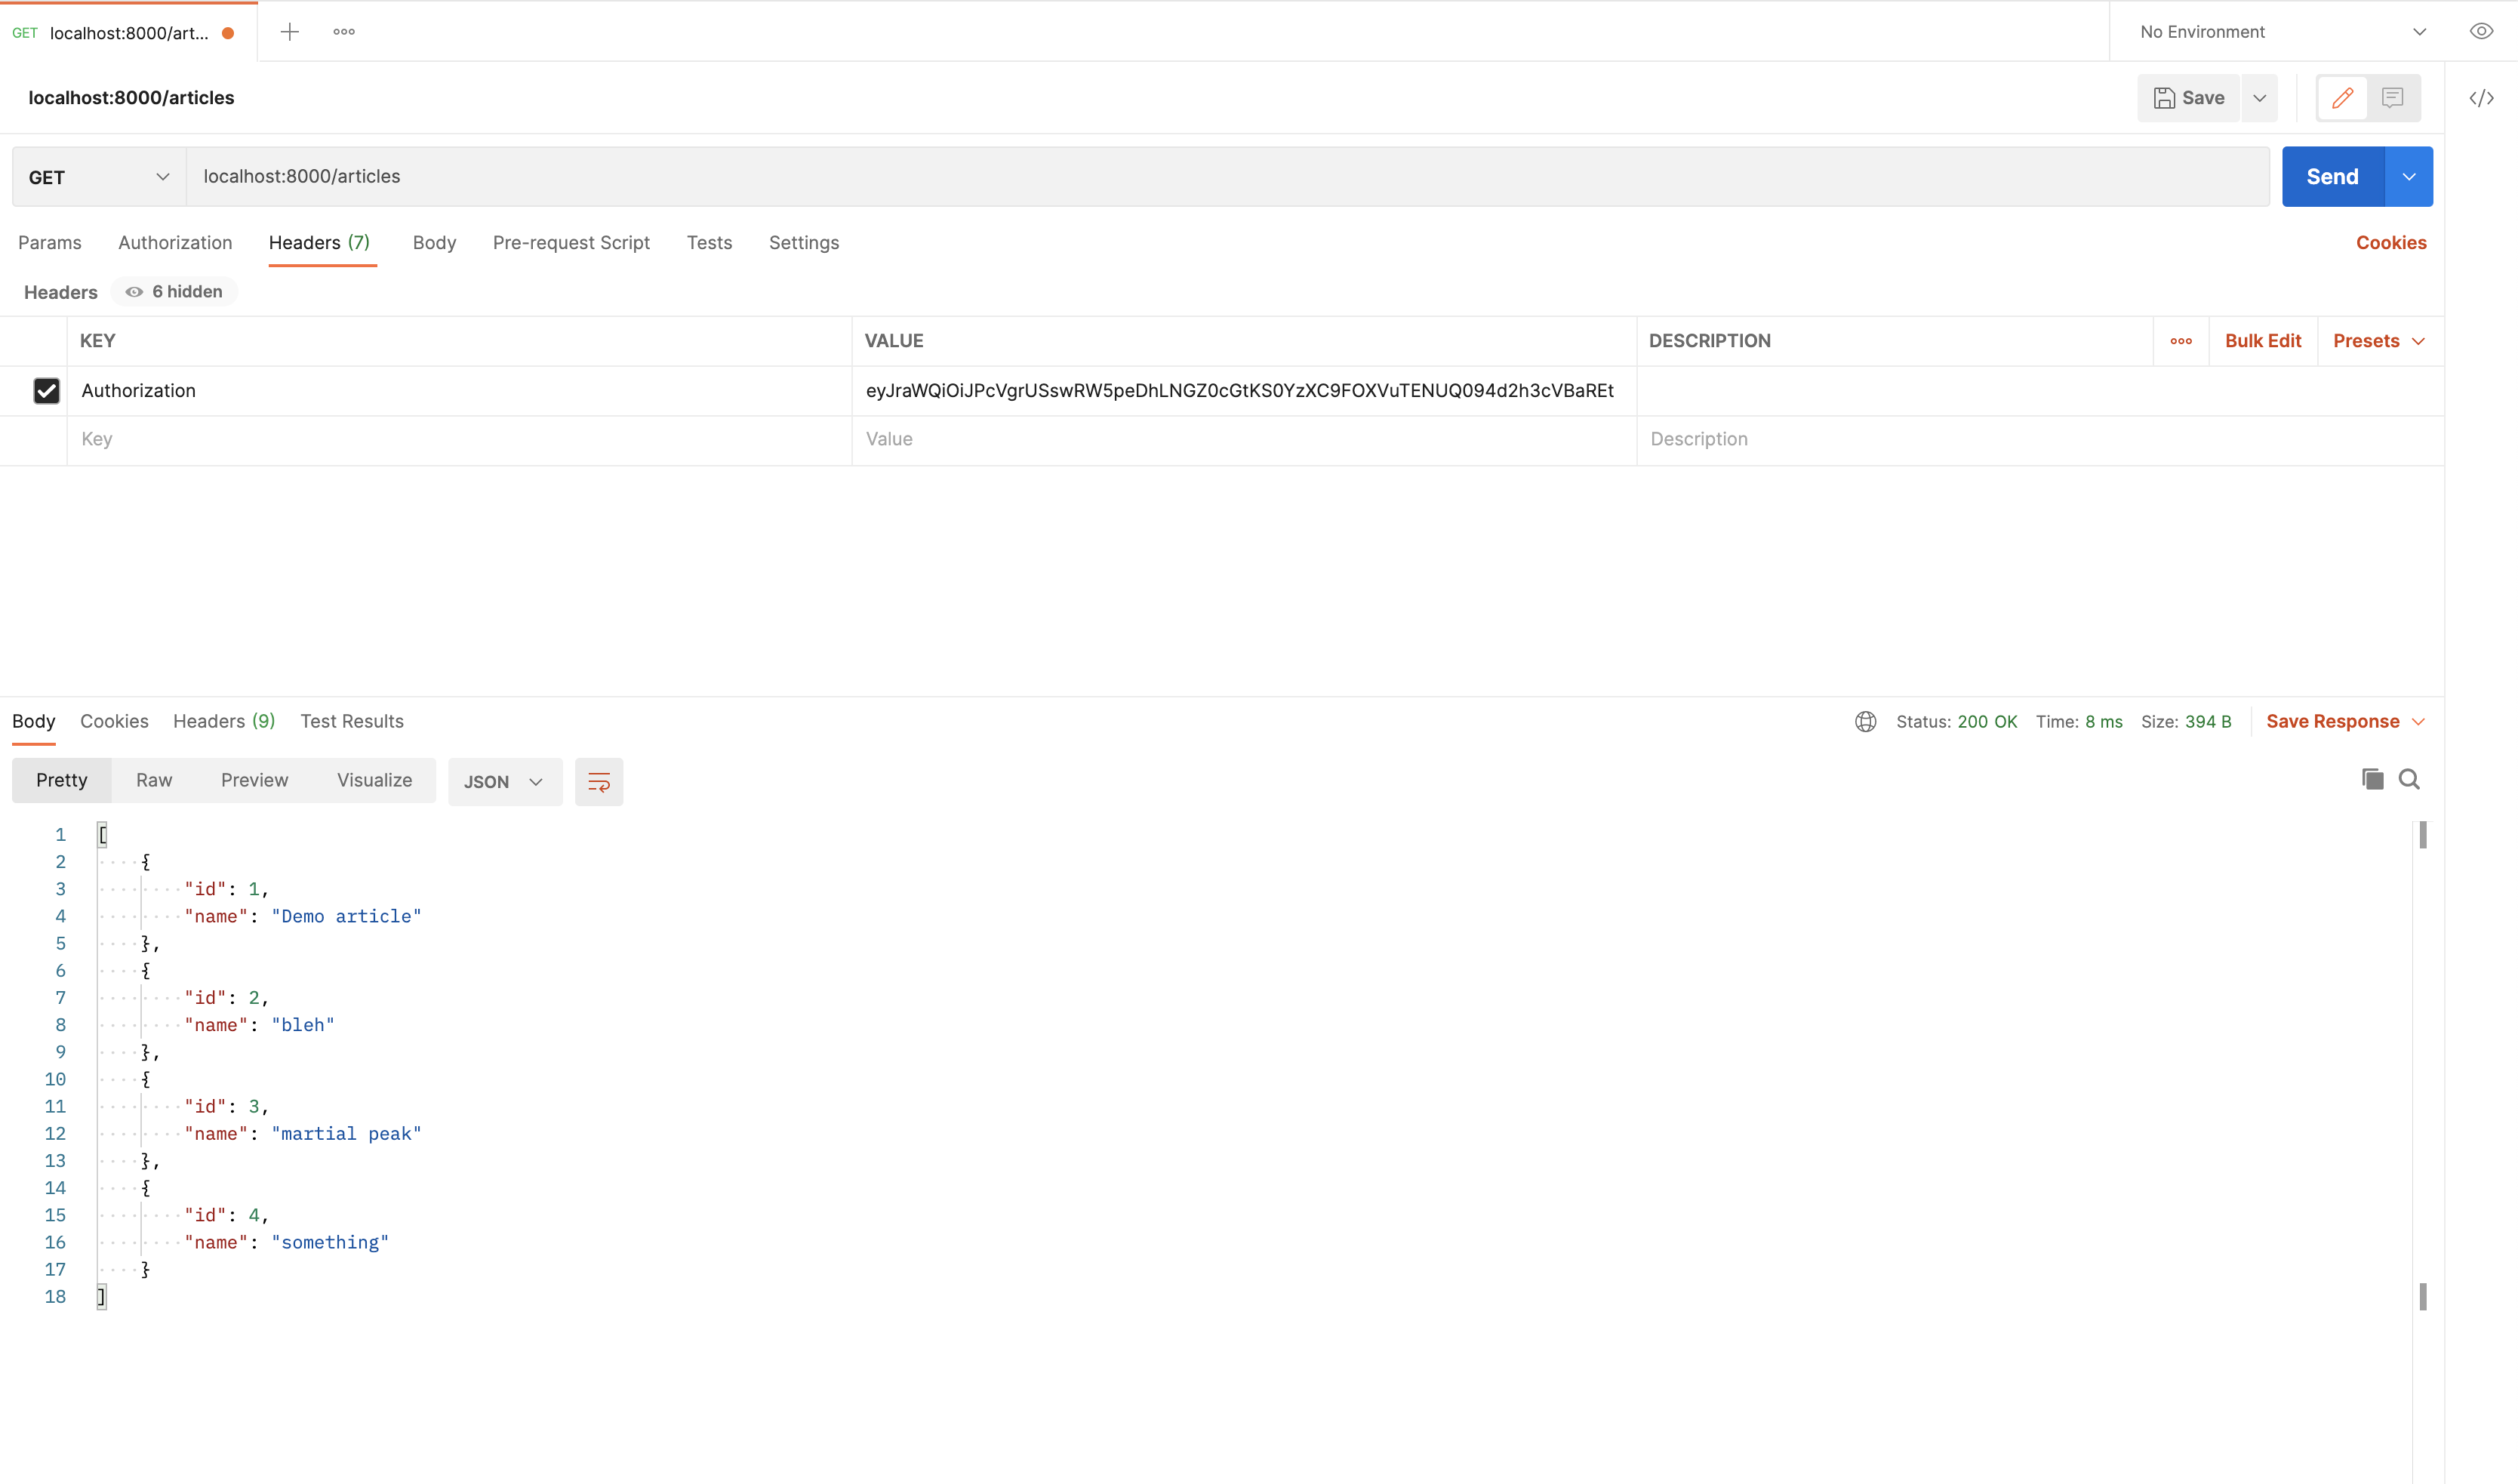
Then navigate to the articles page of backend server i.e. http://localhost:8000/articles. To manually pass headers you can either use a chrome extension called Mod Header or use Postman to make the API Call.
For mod header, just add Authorization in the name and paste the value of idToken copied earlier and refresh the page.
For postman, just add the value of idToken in Authentication header and submit the request.
Thank you for reading the Agiliq blog. This article was written by yvsssantosh on Feb 2, 2021 in django , djangorestframework , drf , aws , aws cognito , reactjs , cognito .
You can subscribe ⚛ to our blog.
We love building amazing apps for web and mobile for our clients. If you are looking for development help, contact us today ✉.
Would you like to download 10+ free Django and Python books? Get them here